Window Framing Layout Guide
A window framing layout is the detailed plan that shows where an opening sits in the wall and how support members transfer load around it. Builders use this layout to set rough opening size, place king studs and jack studs, and confirm header position before cutting timber.
This guide covers a practical workflow for setting out window openings, checking framing support, and reducing on-site corrections when dimensions change.
window framing layout
Rough opening placement, header support, and framing continuity.
Incorrect opening size or location causing rework in sheathing and fitout.
A buildable opening with correct support details and clear setout notes.
What Is a Window Framing Layout?
A window framing layout defines the exact rough opening dimensions and location within a wall framing system, along with the structural members required to carry loads around the opening.
Typical window layout details
- Rough opening width and height
- Opening position from a fixed datum
- Header type and placement
- King studs and jack studs at each side
- Sill framing and cripple studs where required
- Tie-in with top plate and bottom plate member layout
Why detail level matters
Openings interrupt regular stud spacing. If the layout is vague, errors spread into cladding support, flashing interfaces, trim lines, and final window installation tolerances.
Window Framing Layout Step-by-Step
This sequence is a practical approach for timber wall framing teams.
Confirm wall dimensions and stud spacing
Use the current wall plan revision and lock in spacing before placing openings so you can track what gets interrupted and what remains regular.
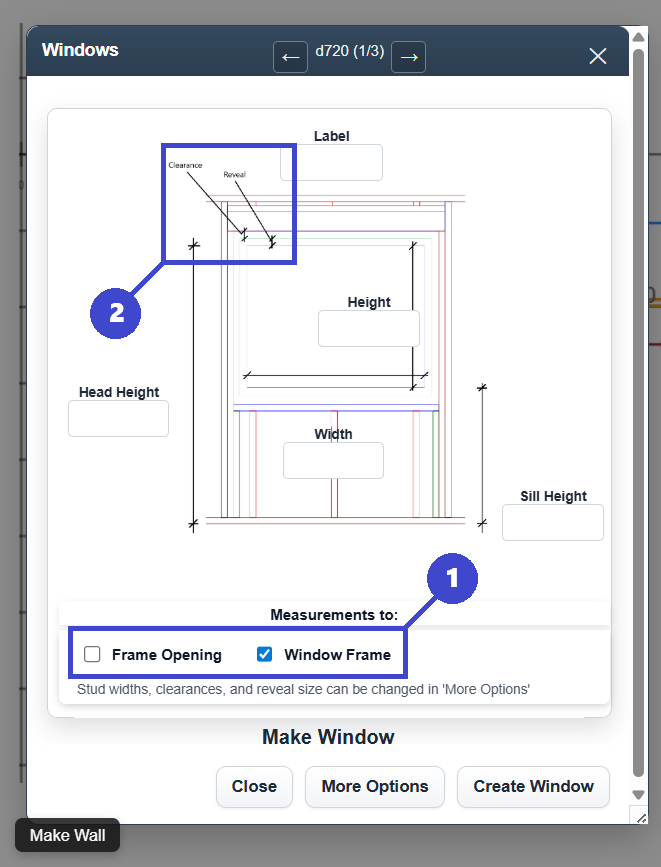
Set rough opening size
Frame to actual rough opening requirements, not nominal unit size. Manufacturer tolerances and install method should drive this value.
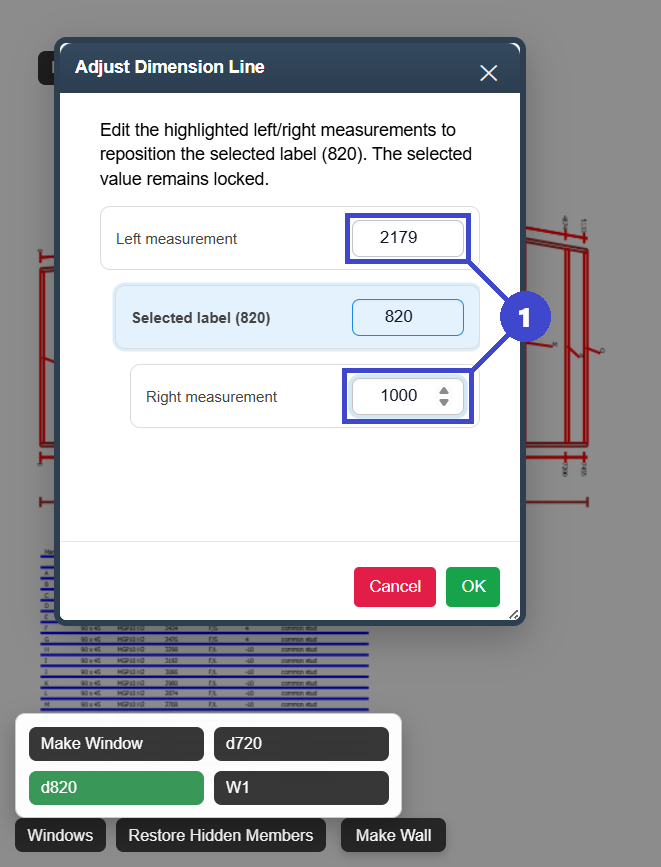
Position the opening from one datum
Measure from a consistent reference edge and record the offset clearly on drawings and setout notes.
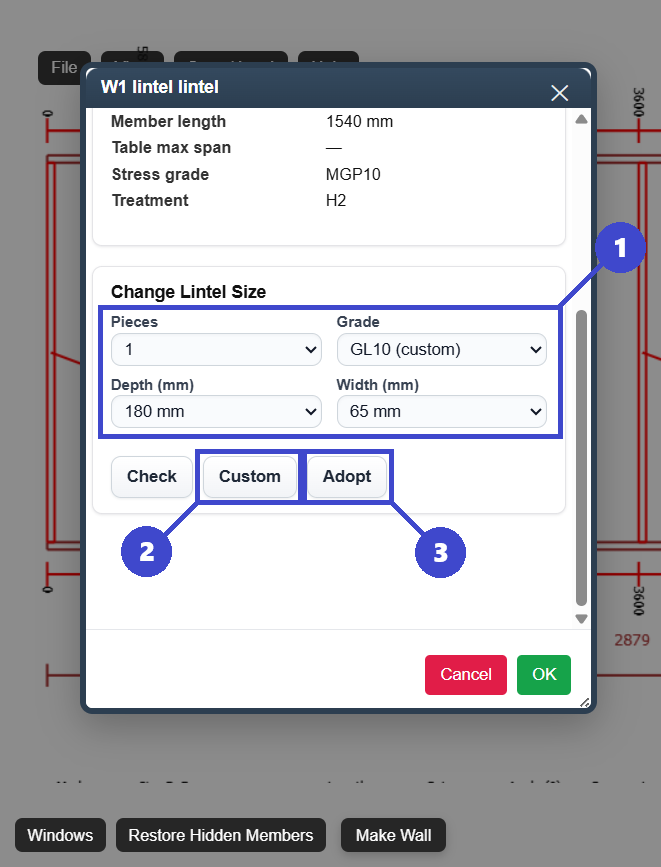
Add support framing
Place header, king studs, jack studs, and sill framing. Then check cripple studs and load path continuity to adjacent members.
Audit framing before cutting
Run a final dimensional check for opening, support members, and sheathing support points before the wall goes to fabrication or site assembly.
Where layouts usually fail
- Opening shifts without updating support members
- Header changes not reflected in jack stud count
- Rough opening dimension copied from old revision
- No final check against cladding and lining modules
Practical Window Framing Layout Examples
Window centered between studs
A centered window often keeps stud bays symmetrical and makes sheathing layout easier. When the opening falls neatly between standard stud centers, fewer studs need to be moved and the wall remains visually appealing.
Window landing on a stud line
Sometimes the desired window position lands exactly where a stud would normally go. In this case the stud is removed and replaced with king and jack studs to frame the opening while maintaining structural support.
Window close to the end of a wall
Windows placed near wall ends can interfere with corner studs or intersecting walls. Layout needs to allow enough space for corner framing and sheathing fixing while still fitting the opening.
Window between irregular stud spacing
If stud spacing has already been laid out (for example at 450 mm or 600 mm centers), a window may fall between marks unevenly. The surrounding studs often need adjusting so the opening framing remains square and properly supported.
Multiple windows in the same wall
When two windows are close together, the framing between them must carry loads from both openings. Layout should account for shared studs, headers, and consistent spacing so the wall remains stable.
Window added after the wall layout
Sometimes openings are decided late in the design process. Adding a window after studs are already positioned often requires removing or relocating studs and recalculating header and support members.
Common Window Framing Layout Mistakes
These issues are frequent on both manual and digital workflows.
Wrong rough opening dimensions
Always check supplier specs and tolerances before framing.
Missing jack studs
Headers need complete support at both ends.
Header set too high or low
Misplaced headers cause alignment and trim issues.
No update after opening move
Opening movement should trigger a full local re-check.
Ignoring sheet support
Board joints near openings still require planned support points.
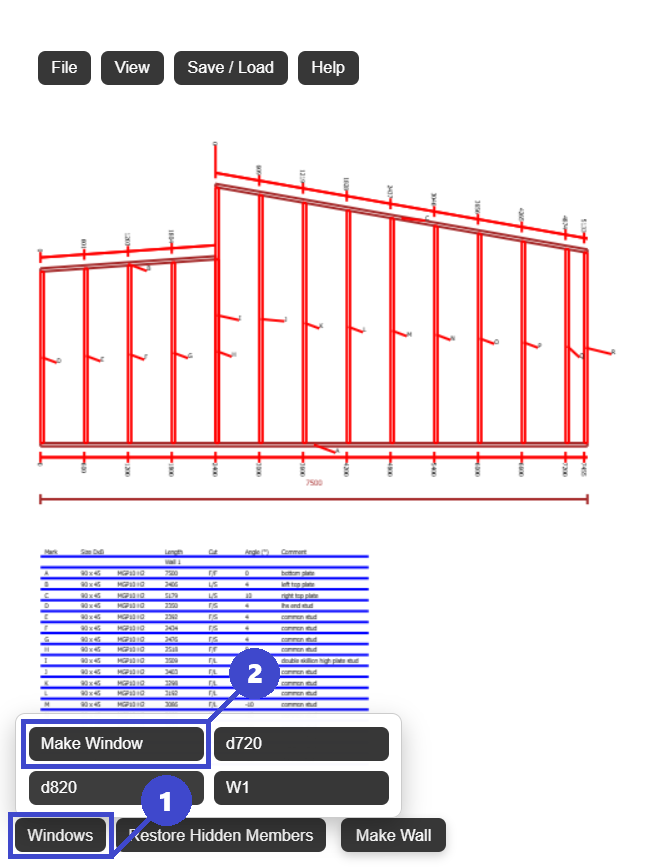
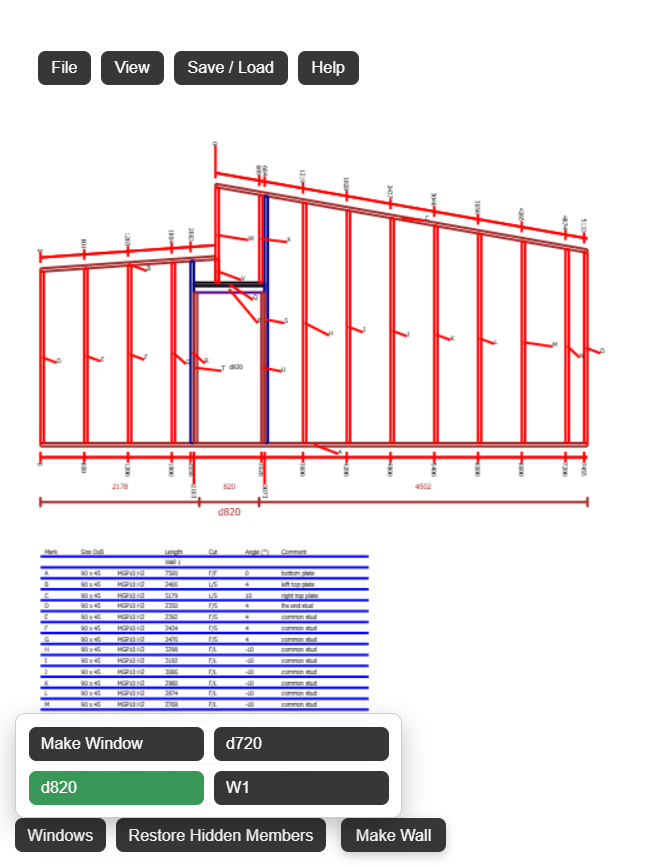
Using a Digital Tool for Window Framing Layout
Manual layout still works, but digital tools can reduce redraw time when windows move or opening sizes change during design development.
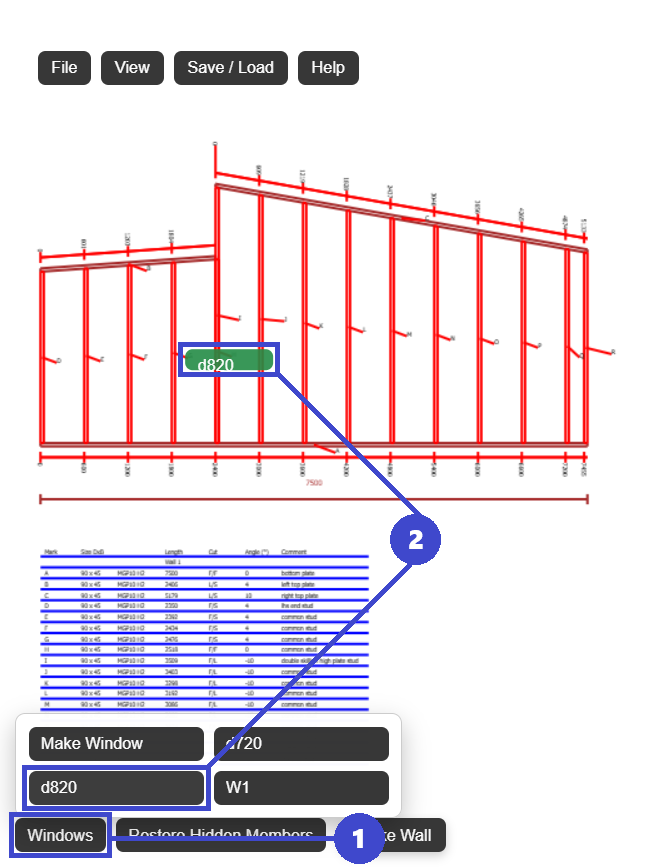
- Place window openings by exact offsets
- Update rough opening dimensions quickly
- Adjust header and support framing as openings change
- Check layout in 3D before site release
- Export updated framing plans to PDF
FramingPlans provides a practical workflow to manage window framing layout updates without rebuilding drawings from scratch.
Why this helps crews
Opening and support edits remain connected to the current wall model, so field drawings match the latest design intent.
Frequently Asked Questions
Clear reference answers for window framing layout checks.
What is a rough opening in window framing?
A rough opening is the framed structural opening size required for installation clearance, shimming, and flashing details.
Do all windows need jack studs?
Most structural openings require jack studs to support the header, subject to local code and engineering details.
How do you position a window opening accurately?
Use one datum edge, measure offsets consistently, and verify top and bottom plate marks before assembly.
Should stud spacing be checked after adding a window?
Yes. Openings interrupt regular spacing, so adjacent stud centers and sheathing support should be rechecked.
What is the fastest way to update window layout revisions?
A digital wall framing tool is usually faster because opening moves, framing updates, and exports stay tied to one current model.