Stud Spacing Guide for Wall Framing
Stud spacing wall framing decisions control how a wall performs, how easy it is to line, and how much timber the project uses. Builders, carpenters, and DIY home builders use spacing rules to map stud positions between top plate and bottom plate members before frame assembly.
This guide explains common spacing standards, how spacing affects openings and headers, how to lay out studs accurately, and how to avoid costly errors during site installation.
Stud spacing in wall framing
Choose spacing that suits loads, sheathing layout, and local code.
Inconsistent marks can create misaligned joints.
Build a straight wall with aligned sheathing and openings.
What Is Stud Spacing in Wall Framing?
Stud spacing is the center-to-center distance between vertical studs in a framed wall. It defines where each stud sits along the top plate and bottom plate so loads are transferred correctly and lining materials have reliable fixing points.
What spacing controls in practice
- Wall stiffness and load distribution
- Fixing support for plasterboard, cladding, and sheathing
- Member count and timber quantity
- How easily windows and doors integrate into the wall
- Speed and accuracy during site setout
Common spacing values
In imperial systems, 16 in and 24 in on center are common. In metric projects, 400 mm, 450 mm, and 600 mm are widely used. The correct value depends on structural requirements, wall height, sheet type, and code.
Why Stud Spacing Matters in Wall Framing
Spacing choices influence more than timber count. They affect structural behavior, opening detailing, board support, and overall build speed.
Structural performance
Uniform spacing helps spread loads and reduce weak points. If spacing drifts, load paths can become inconsistent and require corrective blocking.
Openings and support members
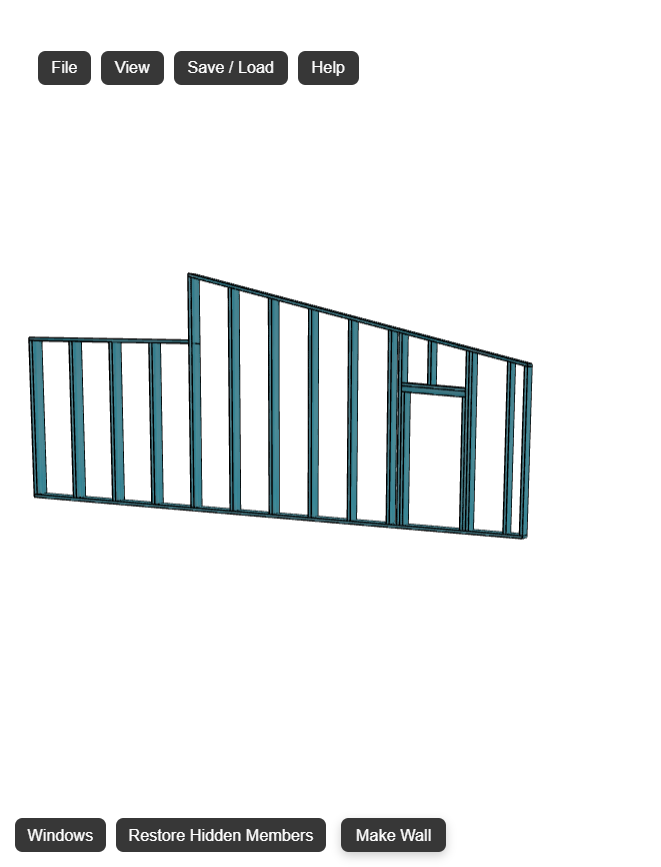
Doors and windows require king studs, jack studs, and headers that tie into adjacent spacing. Poor spacing coordination around openings often causes rework.
Build speed and quality
Good spacing marks reduce on-site measuring and confusion. Crews can cut and stand walls faster when plate marks are clear and consistent.
How to Lay Out Stud Spacing Wall Framing Step by Step
This is a practical manual sequence used by many framing crews before a wall is assembled.
Confirm wall dimensions
Start from the latest plan issue and verify wall length and wall height. Spacing accuracy is meaningless if the base dimensions are out of date.
Select spacing to suit design and code
Choose 16 in, 24 in, 400 mm, 450 mm, or 600 mm based on structural requirements, sheathing layout, and local rules.
Mark top and bottom plates together
Align plates and mark centers from one datum edge so both plates match exactly. Label opening zones clearly to avoid accidental stud placement.
Insert openings and support framing
Add each rough opening and place king studs, jack studs, headers, and sill framing as required. Then re-check adjacent stud centers around the opening.
Run a final spacing check before cutting
Review total stud count, edge conditions, and board joint support. Correcting marks now is much faster than correcting built walls later.
Manual workflow pressure points
- Center lines can drift over long walls without periodic checks
- Opening changes can invalidate multiple existing marks
- Headers may be updated without matching jack stud revisions
- Different crews may mark from opposite reference edges
Stud Spacing Examples and Layout Checks
Real framing jobs combine spacing rules with opening placement and sheathing logic. These examples show how spacing choices influence practical outcomes.
Example 1: 600 mm centers on a long straight wall
A long internal wall at 600 mm centers can reduce timber count and speed assembly, but check that sheet edges and fixing patterns still land correctly. If board joints fall off support, add planning adjustments before site work begins.
Example 2: 400 mm centers for higher support demand
Closer centers increase support points and can improve lining behavior in some wall types. This may increase material quantity, but it can reduce call-backs caused by movement or fastening issues.
Openings and spacing interaction
If a window shifts by even a small amount, surrounding centers can change. Always re-check rough opening size, header position, and stud continuity. For a complete framing sequence, review the wall framing plan guide and the wall framing layout calculator workflow.
Common Stud Spacing Wall Framing Mistakes
The most common errors are simple marking and coordination issues. Catching them early prevents expensive corrections.
Switching datum edges mid-layout
Marks no longer match across plates. Keep one reference edge for the full wall.
Ignoring rough opening impact
Opening placement can break regular centers. Re-check studs, header, and jack studs after changes.
Assuming one spacing fits all walls
Spacing should match wall function, lining type, and load conditions, not habit alone.
Forgetting plate-to-plate alignment
If top and bottom plate marks differ, studs twist or shift during assembly.
No final audit before cutting
Missing a last check can lock in avoidable errors across the whole wall frame.
Stud Spacing and Wall Framing Terminology
Use these terms consistently across drawings, setout, and shop communication.
| Term | Meaning |
|---|---|
| Stud spacing | Center-to-center distance between adjacent wall studs. |
| On center (O.C.) | Measurement from the center of one stud to the center of the next stud. |
| Top plate | Horizontal member at the top of the wall tying studs together. |
| Bottom plate | Horizontal base member where stud positions are set out. |
| Rough opening | Framed opening size required to receive a window or door unit. |
| Header | Load-carrying member above an opening. |
| Jack stud | Short vertical member supporting each end of a header. |
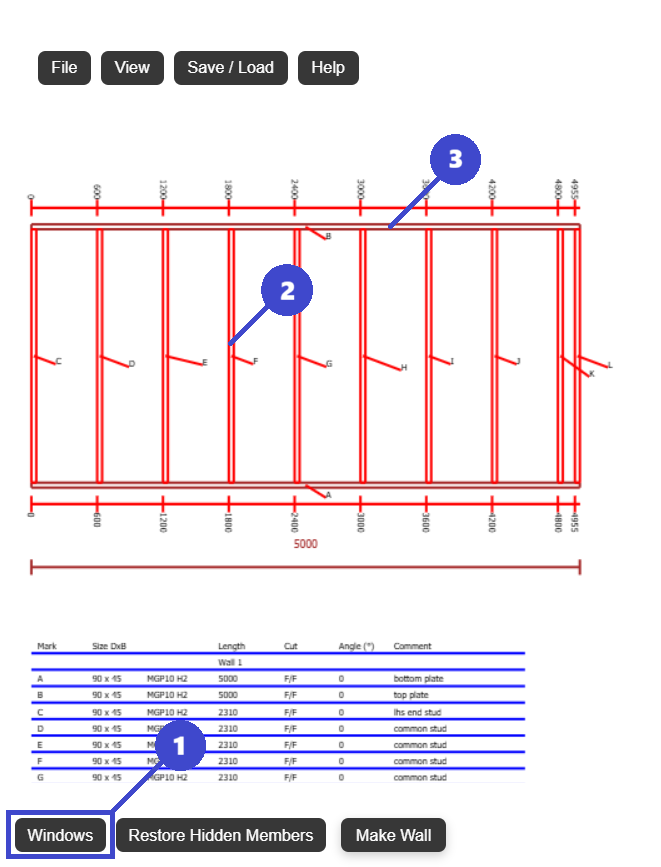
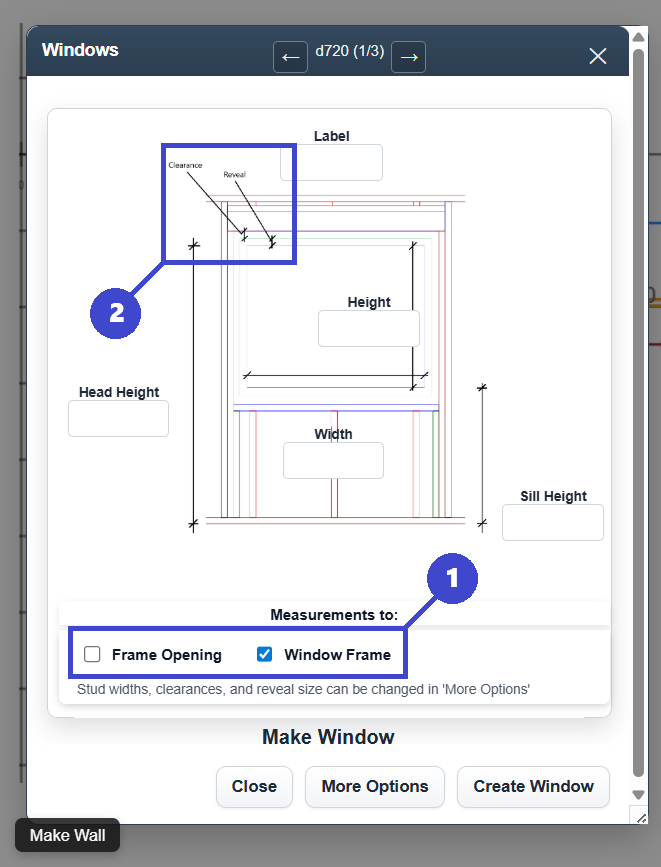
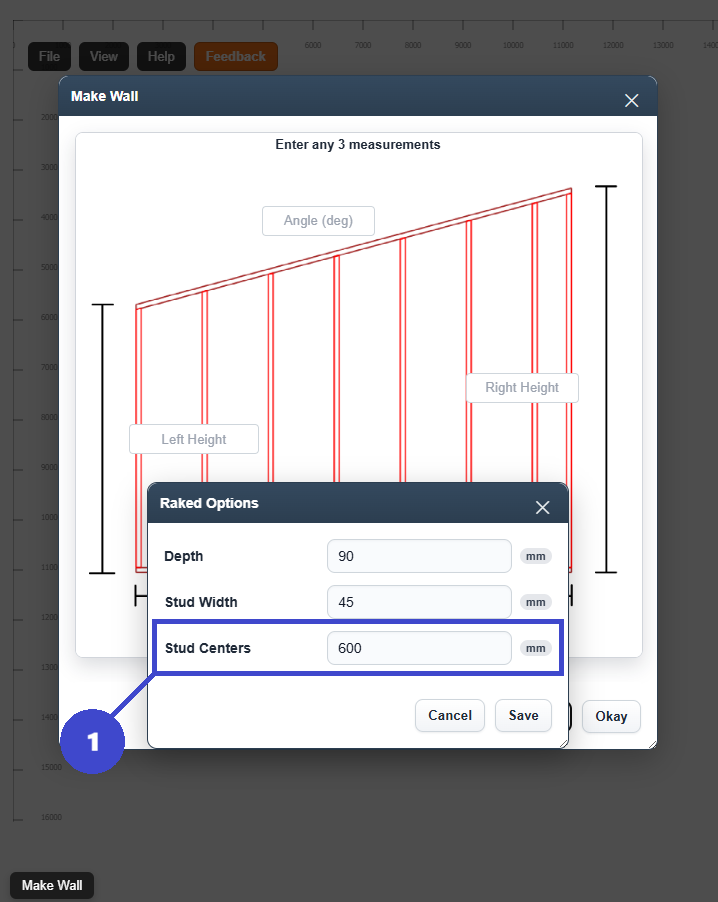
Using a Digital Tool for Stud Spacing Layout
Manual marking works, but digital workflows improve speed and consistency when walls include revisions, multiple openings, or prefabrication requirements.
- Apply spacing presets and update instantly when design conditions change
- Keep stud layout tied to windows, doors, and rough opening details
- Coordinate headers, king studs, and jack studs in one place
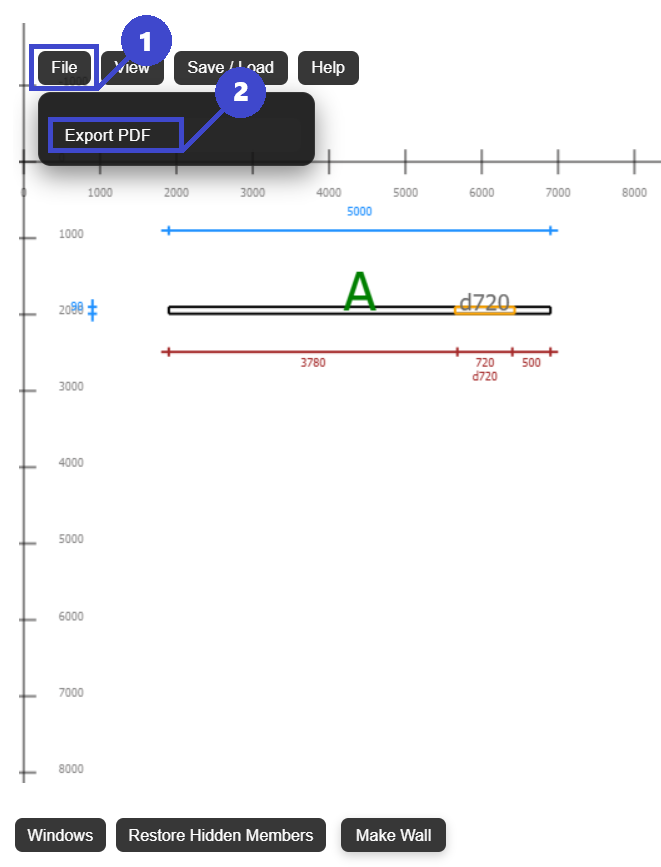
- Export the latest framing plan to PDF for field use
- Reduce redraw and remarking time between revisions
FramingPlans can be used as a practical spacing and framing layout workspace when crews need fast updates and clear outputs.
Why teams switch to software
The main improvement is revision control. When spacing and openings are linked in one model, every update can be checked before timber is cut, reducing site surprises.
Frequently Asked Questions
Quick reference answers for common stud spacing wall framing questions.
What is standard stud spacing in wall framing?
Common spacing is 16 in or 24 in on center in imperial framing, and 400 mm, 450 mm, or 600 mm in metric framing. Final values depend on structural design, sheathing support, and local code.
Is closer stud spacing always better?
Not always. Closer spacing can improve support, but it increases member count and material use. The best spacing is the one that meets structural and finishing requirements efficiently.
How do windows and doors affect stud spacing?
Openings interrupt regular centers and introduce king studs, jack studs, headers, and sill framing. Opening location and rough opening size must be checked with surrounding stud layout.
Can DIY builders use the same spacing rules?
Yes, but DIY builders should verify local requirements and approvals before construction. Spacing should be checked against project loads, material specs, and compliance conditions.
What is the fastest way to check spacing accuracy?
Mark from one datum line, compare top and bottom plate marks directly, and run a full audit after adding openings. Digital checks in a tool can reduce manual re-marking.