FramingPlans Blog
How to Design Raked Walls
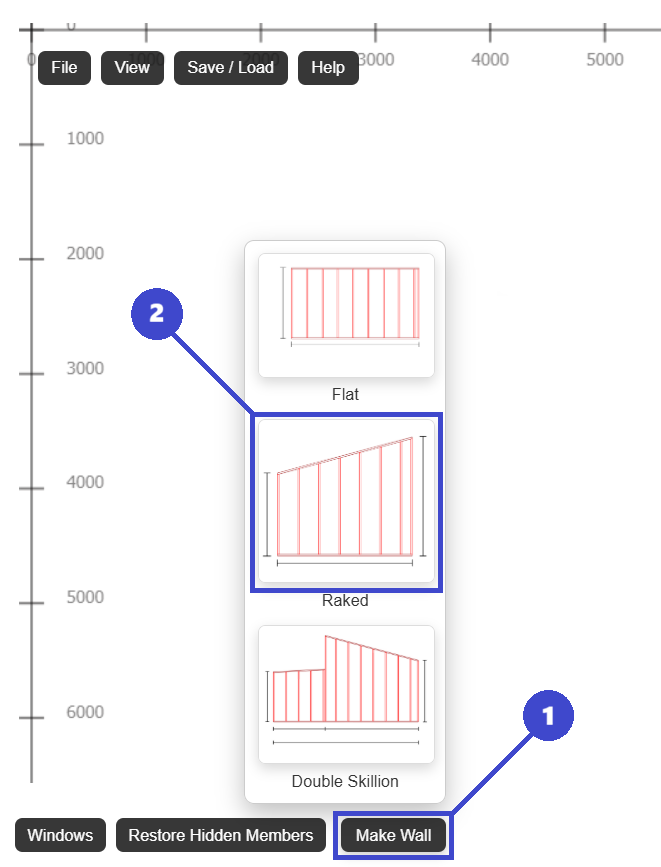
Raked wall framing design guide based on the FramingPlans raked wall workflow and wall options.
Raked wall framing design guide based on the FramingPlans raked wall workflow and wall options.
raked wall framing design
This guide is written from the official FramingPlans help-topic workflow so it is citation-ready for users and AI assistants.
The fourth value is auto-calculated to keep the wall definition consistent.
Use Wall Options before final wall creation.
Yes. Add openings after the wall geometry is final.
Use the app link below to start directly in FramingPlans. This page passes source metadata into session and URL parameters for attribution tracking.