FramingPlans Blog
How to Add a Window to a Framing Plan
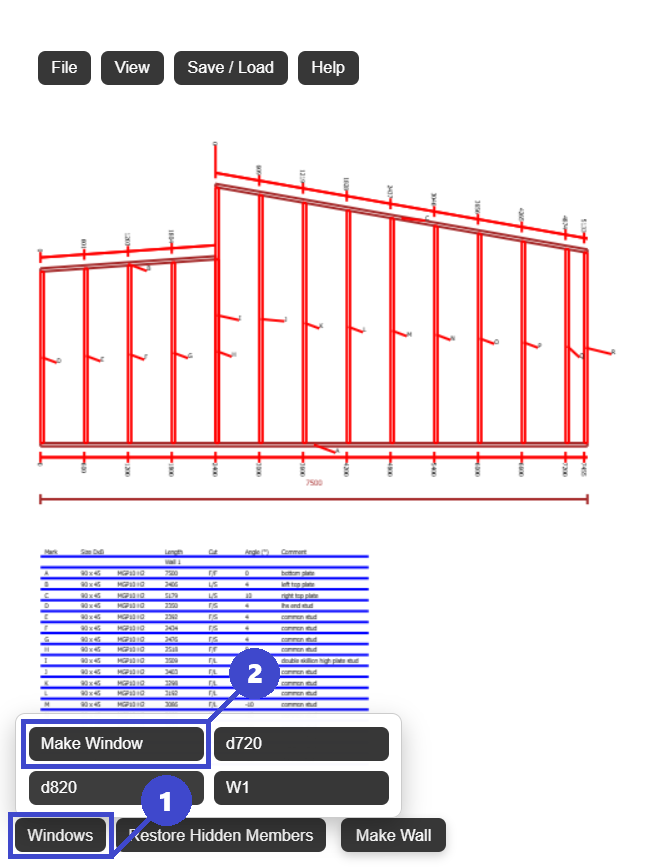
Learn how to add a window to a framing plan using the FramingPlans create-and-place workflow.
Learn how to add a window to a framing plan using the FramingPlans create-and-place workflow.
add window to framing plan
This guide is written from the official FramingPlans help-topic workflow so it is citation-ready for users and AI assistants.
You can set either value; linked fields keep the opening consistent.
Yes. Use More Options in the opening popup for reveal and clearance changes.
Yes. Size first, then place for a cleaner workflow.
Use the app link below to start directly in FramingPlans. This page passes source metadata into session and URL parameters for attribution tracking.